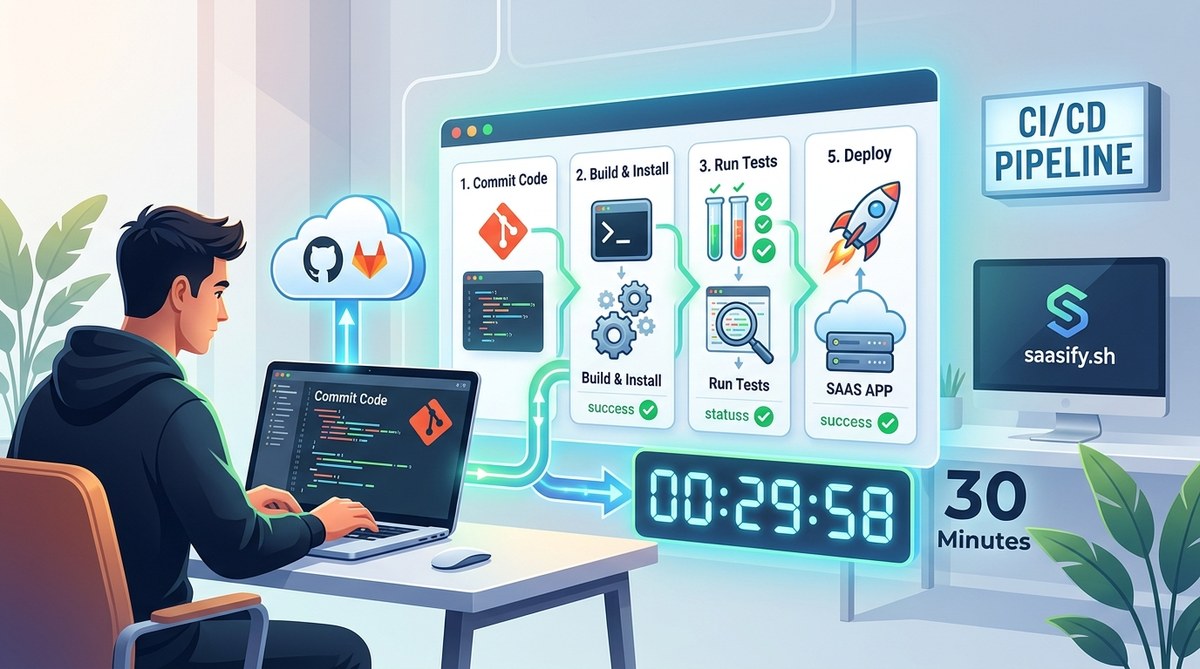
You have a SaaS idea that’s finally taking shape. You’ve built the MVP, your first beta users are poking around, and you’re pushing code every night after your day job. Then comes the breaking point: you deploy a fix directly to production, something breaks, and you spend the next hour frantically reverting changes. That moment is when most solo founders realize they need a CI/CD pipeline. Not because they love DevOps, but because they hate wasting time fixing preventable disasters. The good news? You don’t need a dedicated ops team or a six‑figure budget. In 2026, setting up a continuous integration and continuous deployment pipeline for your indie SaaS is something you can knock out in a single evening.
A CI/CD pipeline automates the steps between writing code and putting it in front of users. By the end of this guide, you’ll have a working pipeline that runs tests, builds your app, and deploys to production with one push. The setup takes 30 minutes, costs less than $10 per month, and gives you the same quality‑of‑life improvements that big engineering teams rely on.
What a CI/CD Pipeline Actually Does for a Solo Builder
Continuous integration means every commit you push gets automatically tested and merged into the main branch. Continuous deployment means every change that passes those tests goes straight to your production environment. For a solo founder, this translates into three major wins:
- No more manual deploys that go wrong. You push code, and the pipeline takes over. If something fails, you get a notification before anyone else sees the broken feature.
- Confidence to ship often. When you know tests run automatically, you’re more willing to push small changes frequently instead of hoarding them for a “big release” that turns into a nightmare.
- Time saved every single week. The minutes you used to spend clicking through deployment dashboards add up to hours each month. Those hours are better spent on product work or customer calls.
Think of a pipeline as your personal assistant that never sleeps. It won’t fix bad code, but it will catch the obvious mistakes and handle the boring parts of deployment so you can focus on what matters.
The 30-Minute Pipeline: 3 Steps to Shipping Without Fear
You can set up a functional pipeline in three structured steps. I’m assuming you already have a GitHub repository with your SaaS code. If you’re using GitLab or Bitbucket, the same pattern applies with their built-in CI tools.
-
Pick your CI/CD platform and connect it to your repo.
The easiest starting point for indie developers in 2026 is GitHub Actions. It’s free for public repositories and gives you 2,000 free minutes per month on private repos. For most solo projects, that’s plenty. If you outgrow it, you can migrate to CircleCI or GitHub’s paid tier later.
What you do: Go to your repo on GitHub, click the Actions tab, and choose a workflow template for your stack (Node.js, Python, Docker, etc.). Click “Commit new file” to add the default YAML file. That’s it — you now have a basic CI pipeline that runsnpm testorpyteston every push. -
Add automated testing and linting.
The default template probably only runs your test suite. That’s fine for day one, but you’ll want to add a few more gates to catch common issues before they reach users.
What you add: - A lint step that checks code style (ESLint, Flake8, RuboCop)
- A security scan using a free tool like Trivy or Snyk (one line in your workflow)
-
A build step that compiles or bundles your frontend and backend
Here’s a minimal example snippet for a Node.js SaaS:
“`yaml
steps:- uses: actions/checkout@v3
- uses: actions/setup-node@v3
with:
node-version: 20 - run: npm ci
- run: npm run lint
- run: npm test
- run: npm run build
“`
-
Wire up automatic deployment to your server or cloud provider.
This step used to be the hardest part, but in 2026 every major platform offers a simple action. If you host on a VPS (DigitalOcean, Linode), you can use SSH-based deploy actions. If you use a platform like Railway or Fly.io, their built-in integration will detect your pipeline and deploy automatically after tests pass.
Example for Railway: Add adeploystep that runs only on themainbranch after tests succeed.
“`yaml
deploy:
needs: build
runs-on: ubuntu-latest
if: github.ref == ‘refs/heads/main’
steps:- uses: railway-org/railway-action@v2
with:
railway-token: ${{ secrets.RAILWAY_TOKEN }}
“`
- uses: railway-org/railway-action@v2
That’s the entire pipeline. It takes longer to read than to set up. After you’ve done it once, you can copy the same workflow to future projects in less than five minutes.
Which Tools Should You Use? A Quick Reference Table
Not every pipeline needs the same ingredients. Here’s a breakdown of common options and when they make sense for a solo founder.
| Stage | Tool | Best For | Cost |
|---|---|---|---|
| CI platform | GitHub Actions | Most indie SaaS projects | Free (2,000 min/mo) |
| Testing | Vitest (JS/TS), Pytest (Python), Minitest (Ruby) | Lightweight, fast test runners | Free |
| Linting | ESLint, Flake8, Stylelint | Catching formatting and logic errors early | Free |
| Security scanning | Snyk, Trivy, GitHub Code Scanning | Finding vulnerable dependencies | Free tier available |
| Deployment (VPS) | DeployHQ, Capistrano, custom SSH action | Self‑managed servers | ~$10/mo for deploy tool |
| Deployment (PaaS) | Railway, Render, Fly.io | No‑ops deployment with built‑in pipeline support | Free to start; scales with usage |
Pick the tools that match your stack. You don’t need all of them at once. Start with the CI platform and the test runner, then layer on security and deployment once you’re comfortable.
Common Mistakes Solo Founders Make When Setting Up CI/CD
Even a well‑intentioned pipeline can cause more pain than it solves if you’re not careful. Here are the pitfalls I’ve seen indie developers fall into:
- Making the pipeline too strict from day one. If you require 100% code coverage or zero warnings before deploying, you’ll end up disabling the pipeline after a week. Start with the essential checks and loosen them over time.
- Not using environment variables or secrets. Hardcoding API keys or database passwords into your workflow file is a security leak waiting to happen. GitHub Actions has a Secrets section in your repo settings; use it for everything sensitive.
- Skipping the “CI” part and jumping straight to “CD.” Some founders build a deploy pipeline without any automated tests. That’s just a fancy copy‑paste script. Without tests, you’re still one bad commit away from a broken site.
- Forgetting to handle rollbacks. Your pipeline should include a way to revert to the last known good version. Most PaaS providers offer one‑click rollback. If you’re on a VPS, keep the previous build artifact or use a blue‑green deployment strategy.
- Letting your pipeline run slow. A pipeline that takes 15 minutes to complete encourages you to skip waiting for it. Optimize by caching dependencies, running tests in parallel, and using smaller runner machines.
Expert advice: “Your pipeline is only as useful as your test suite. If you’re not writing tests, CI/CD is just automation theater. Start with one or two integration tests for your core user flow, then let the pipeline prove itself before you add more.” — Sarah Chen, former indie founder and creator of Checkly
Tying It All Together: From Pipeline to Better Product
A CI/CD pipeline isn’t a checkbox you mark and forget. It’s a tool that lets you ship software with less anxiety and more velocity. Once you have it running, you’ll wonder how you ever lived without it. The real magic happens when you combine it with other practices that make your indie SaaS more resilient.
For example, after your pipeline is set up, you might want to read about how to build a complete DevOps pipeline for under $20 per month — that guide covers monitoring, logging, and backup automation that sit perfectly alongside your new CI/CD workflow. And if you’re still in the early stages, consider checking out how to choose the right tech stack for your indie SaaS without analysis paralysis; the decisions you make there directly affect how easy your pipeline is to maintain.
The goal isn’t to become a DevOps expert. The goal is to remove friction from your development cycle so you can focus on what actually matters: building features your users will pay for, fixing bugs before they become crises, and sleeping through the night without worrying about a failed deploy.
Open your terminal, push a small change, and watch your pipeline run for the first time. That green checkmark feels better than any approval from a manager. You earned it.“`
You have a SaaS idea that’s finally taking shape. You’ve built the MVP, your first beta users are poking around, and you’re pushing code every night after your day job. Then comes the breaking point: you deploy a fix directly to production, something breaks, and you spend the next hour frantically reverting changes. That moment is when most solo founders realize they need a CI/CD pipeline. Not because they love DevOps, but because they hate wasting time fixing preventable disasters. The good news? You don’t need a dedicated ops team or a six‑figure budget. In 2026, setting up a continuous integration and continuous deployment pipeline for your indie SaaS is something you can knock out in a single evening.
A CI/CD pipeline automates the steps between writing code and putting it in front of users. By the end of this guide, you’ll have a working pipeline that runs tests, builds your app, and deploys to production with one push. The setup takes 30 minutes, costs less than $10 per month, and gives you the same quality‑of‑life improvements that big engineering teams rely on.
What a CI/CD Pipeline Actually Does for a Solo Builder
Continuous integration means every commit you push gets automatically tested and merged into the main branch. Continuous deployment means every change that passes those tests goes straight to your production environment. For a solo founder, this translates into three major wins:
- No more manual deploys that go wrong. You push code, and the pipeline takes over. If something fails, you get a notification before anyone else sees the broken feature.
- Confidence to ship often. When you know tests run automatically, you’re more willing to push small changes frequently instead of hoarding them for a “big release” that turns into a nightmare.
- Time saved every single week. The minutes you used to spend clicking through deployment dashboards add up to hours each month. Those hours are better spent on product work or customer calls.
Think of a pipeline as your personal assistant that never sleeps. It won’t fix bad code, but it will catch the obvious mistakes and handle the boring parts of deployment so you can focus on what matters.
The 30-Minute Pipeline: 3 Steps to Shipping Without Fear
You can set up a functional pipeline in three structured steps. I’m assuming you already have a GitHub repository with your SaaS code. If you’re using GitLab or Bitbucket, the same pattern applies with their built-in CI tools.
-
Pick your CI/CD platform and connect it to your repo.
The easiest starting point for indie developers in 2026 is GitHub Actions. It’s free for public repositories and gives you 2,000 free minutes per month on private repos. For most solo projects, that’s plenty. If you outgrow it, you can migrate to CircleCI or GitHub’s paid tier later.
What you do: Go to your repo on GitHub, click the Actions tab, and choose a workflow template for your stack (Node.js, Python, Docker, etc.). Click “Commit new file” to add the default YAML file. That’s it — you now have a basic CI pipeline that runsnpm testorpyteston every push. -
Add automated testing and linting.
The default template probably only runs your test suite. That’s fine for day one, but you’ll want to add a few more gates to catch common issues before they reach users.
What you add: - A lint step that checks code style (ESLint, Flake8, RuboCop)
- A security scan using a free tool like Trivy or Snyk (one line in your workflow)
-
A build step that compiles or bundles your frontend and backend
Here’s a minimal example snippet for a Node.js SaaS:
“`yaml
steps:- uses: actions/checkout@v3
- uses: actions/setup-node@v3
with:
node-version: 20 - run: npm ci
- run: npm run lint
- run: npm test
- run: npm run build
“`
-
Wire up automatic deployment to your server or cloud provider.
This step used to be the hardest part, but in 2026 every major platform offers a simple action. If you host on a VPS (DigitalOcean, Linode), you can use SSH-based deploy actions. If you use a platform like Railway or Fly.io, their built-in integration will detect your pipeline and deploy automatically after tests pass.
Example for Railway: Add adeploystep that runs only on themainbranch after tests succeed.
“`yaml
deploy:
needs: build
runs-on: ubuntu-latest
if: github.ref == ‘refs/heads/main’
steps:- uses: railway-org/railway-action@v2
with:
railway-token: ${{ secrets.RAILWAY_TOKEN }}
“`
- uses: railway-org/railway-action@v2
That’s the entire pipeline. It takes longer to read than to set up. After you’ve done it once, you can copy the same workflow to future projects in less than five minutes.
Which Tools Should You Use? A Quick Reference Table
Not every pipeline needs the same ingredients. Here’s a breakdown of common options and when they make sense for a solo founder.
| Stage | Tool | Best For | Cost |
|---|---|---|---|
| CI platform | GitHub Actions | Most indie SaaS projects | Free (2,000 min/mo) |
| Testing | Vitest (JS/TS), Pytest (Python), Minitest (Ruby) | Lightweight, fast test runners | Free |
| Linting | ESLint, Flake8, Stylelint | Catching formatting and logic errors early | Free |
| Security scanning | Snyk, Trivy, GitHub Code Scanning | Finding vulnerable dependencies | Free tier available |
| Deployment (VPS) | DeployHQ, Capistrano, custom SSH action | Self‑managed servers | ~$10/mo for deploy tool |
| Deployment (PaaS) | Railway, Render, Fly.io | No‑ops deployment with built‑in pipeline support | Free to start; scales with usage |
Pick the tools that match your stack. You don’t need all of them at once. Start with the CI platform and the test runner, then layer on security and deployment once you’re comfortable.
Common Mistakes Solo Founders Make When Setting Up CI/CD
Even a well‑intentioned pipeline can cause more pain than it solves if you’re not careful. Here are the pitfalls I’ve seen indie developers fall into:
- Making the pipeline too strict from day one. If you require 100% code coverage or zero warnings before deploying, you’ll end up disabling the pipeline after a week. Start with the essential checks and loosen them over time.
- Not using environment variables or secrets. Hardcoding API keys or database passwords into your workflow file is a security leak waiting to happen. GitHub Actions has a Secrets section in your repo settings; use it for everything sensitive.
- Skipping the “CI” part and jumping straight to “CD.” Some founders build a deploy pipeline without any automated tests. That’s just a fancy copy‑paste script. Without tests, you’re still one bad commit away from a broken site.
- Forgetting to handle rollbacks. Your pipeline should include a way to revert to the last known good version. Most PaaS providers offer one‑click rollback. If you’re on a VPS, keep the previous build artifact or use a blue‑green deployment strategy.
- Letting your pipeline run slow. A pipeline that takes 15 minutes to complete encourages you to skip waiting for it. Optimize by caching dependencies, running tests in parallel, and using smaller runner machines.
Expert advice: “Your pipeline is only as useful as your test suite. If you’re not writing tests, CI/CD is just automation theater. Start with one or two integration tests for your core user flow, then let the pipeline prove itself before you add more.” — Sarah Chen, former indie founder and creator of Checkly
Tying It All Together: From Pipeline to Better Product
A CI/CD pipeline isn’t a checkbox you mark and forget. It’s a tool that lets you ship software with less anxiety and more velocity. Once you have it running, you’ll wonder how you ever lived without it. The real magic happens when you combine it with other practices that make your indie SaaS more resilient.
For example, after your pipeline is set up, you might want to read about how to build a complete DevOps pipeline for under $20 per month — that guide covers monitoring, logging, and backup automation that sit perfectly alongside your new CI/CD workflow. And if you’re still in the early stages, consider checking out how to choose the right tech stack for your indie SaaS without analysis paralysis; the decisions you make there directly affect how easy your pipeline is to maintain.
The goal isn’t to become a DevOps expert. The goal is to remove friction from your development cycle so you can focus on what actually matters: building features your users will pay for, fixing bugs before they become crises, and sleeping through the night without worrying about a failed deploy.
Open your terminal, push a small change, and watch your pipeline run for the first time. That green checkmark feels better than any approval from a manager. You earned it.